
It’s been busy around here with all the incubation-related activity, and I admit to having skipped an update with the results of the second candling of the two remaining eggs from this severely shipping-damaged group. After ending up with only 2 eggs (of 13) developing after the first candling, I didn’t have high hopes of having any eggs make it to lockdown. But one did.
At the second candling, 14 days into incubation, one of the previously-developing eggs had quit and another that I suspected might quit – the veining was strange and skimpy – did. I’ve found quitters to be very common with eggs that have been damaged during shipping, so I wasn’t entirely surprised.

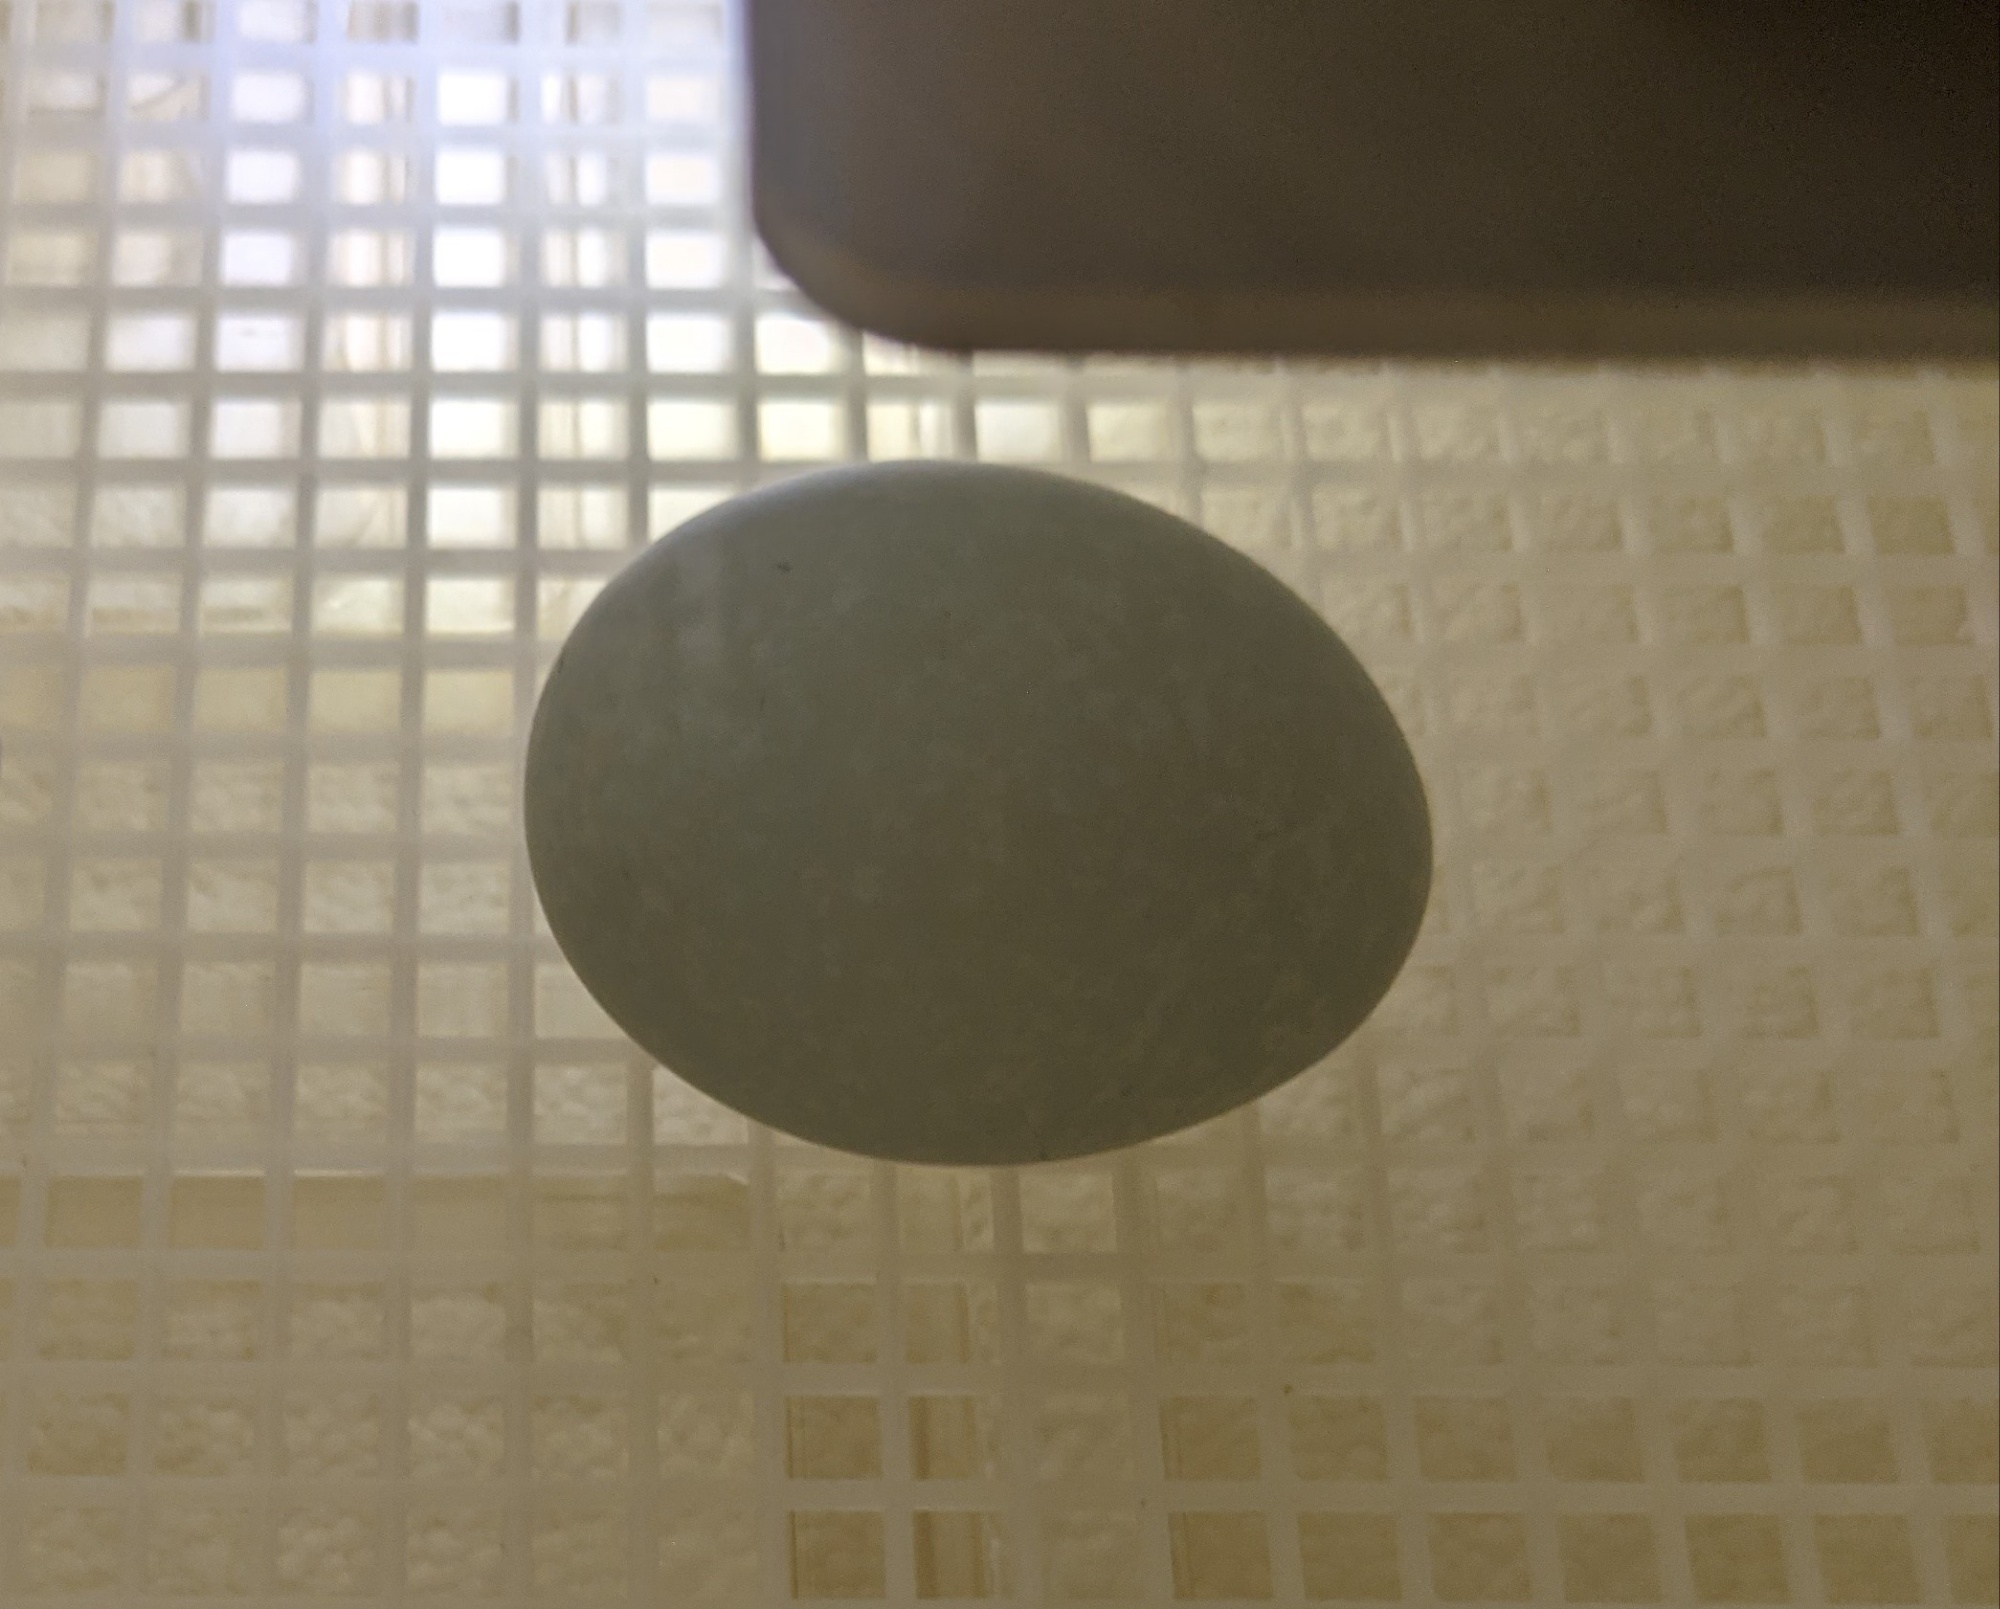
What did surprise me was that the last remaining egg, though its air cell had the characteristic “saddle” shape that indicated it suffered violent shaking on its way here, had a prominent network of healthy blood vessels. Seeing this fed the small bit of hope I had that maybe – just maybe – this one chick might beat the odds and hatch.
Ironically, of two previous groups of shipped Lavender Ameraucana eggs I incubated, I ended up with just one chick. If this one hatches, then there will be two. And hopefully, this one will turn out to be a pullet!
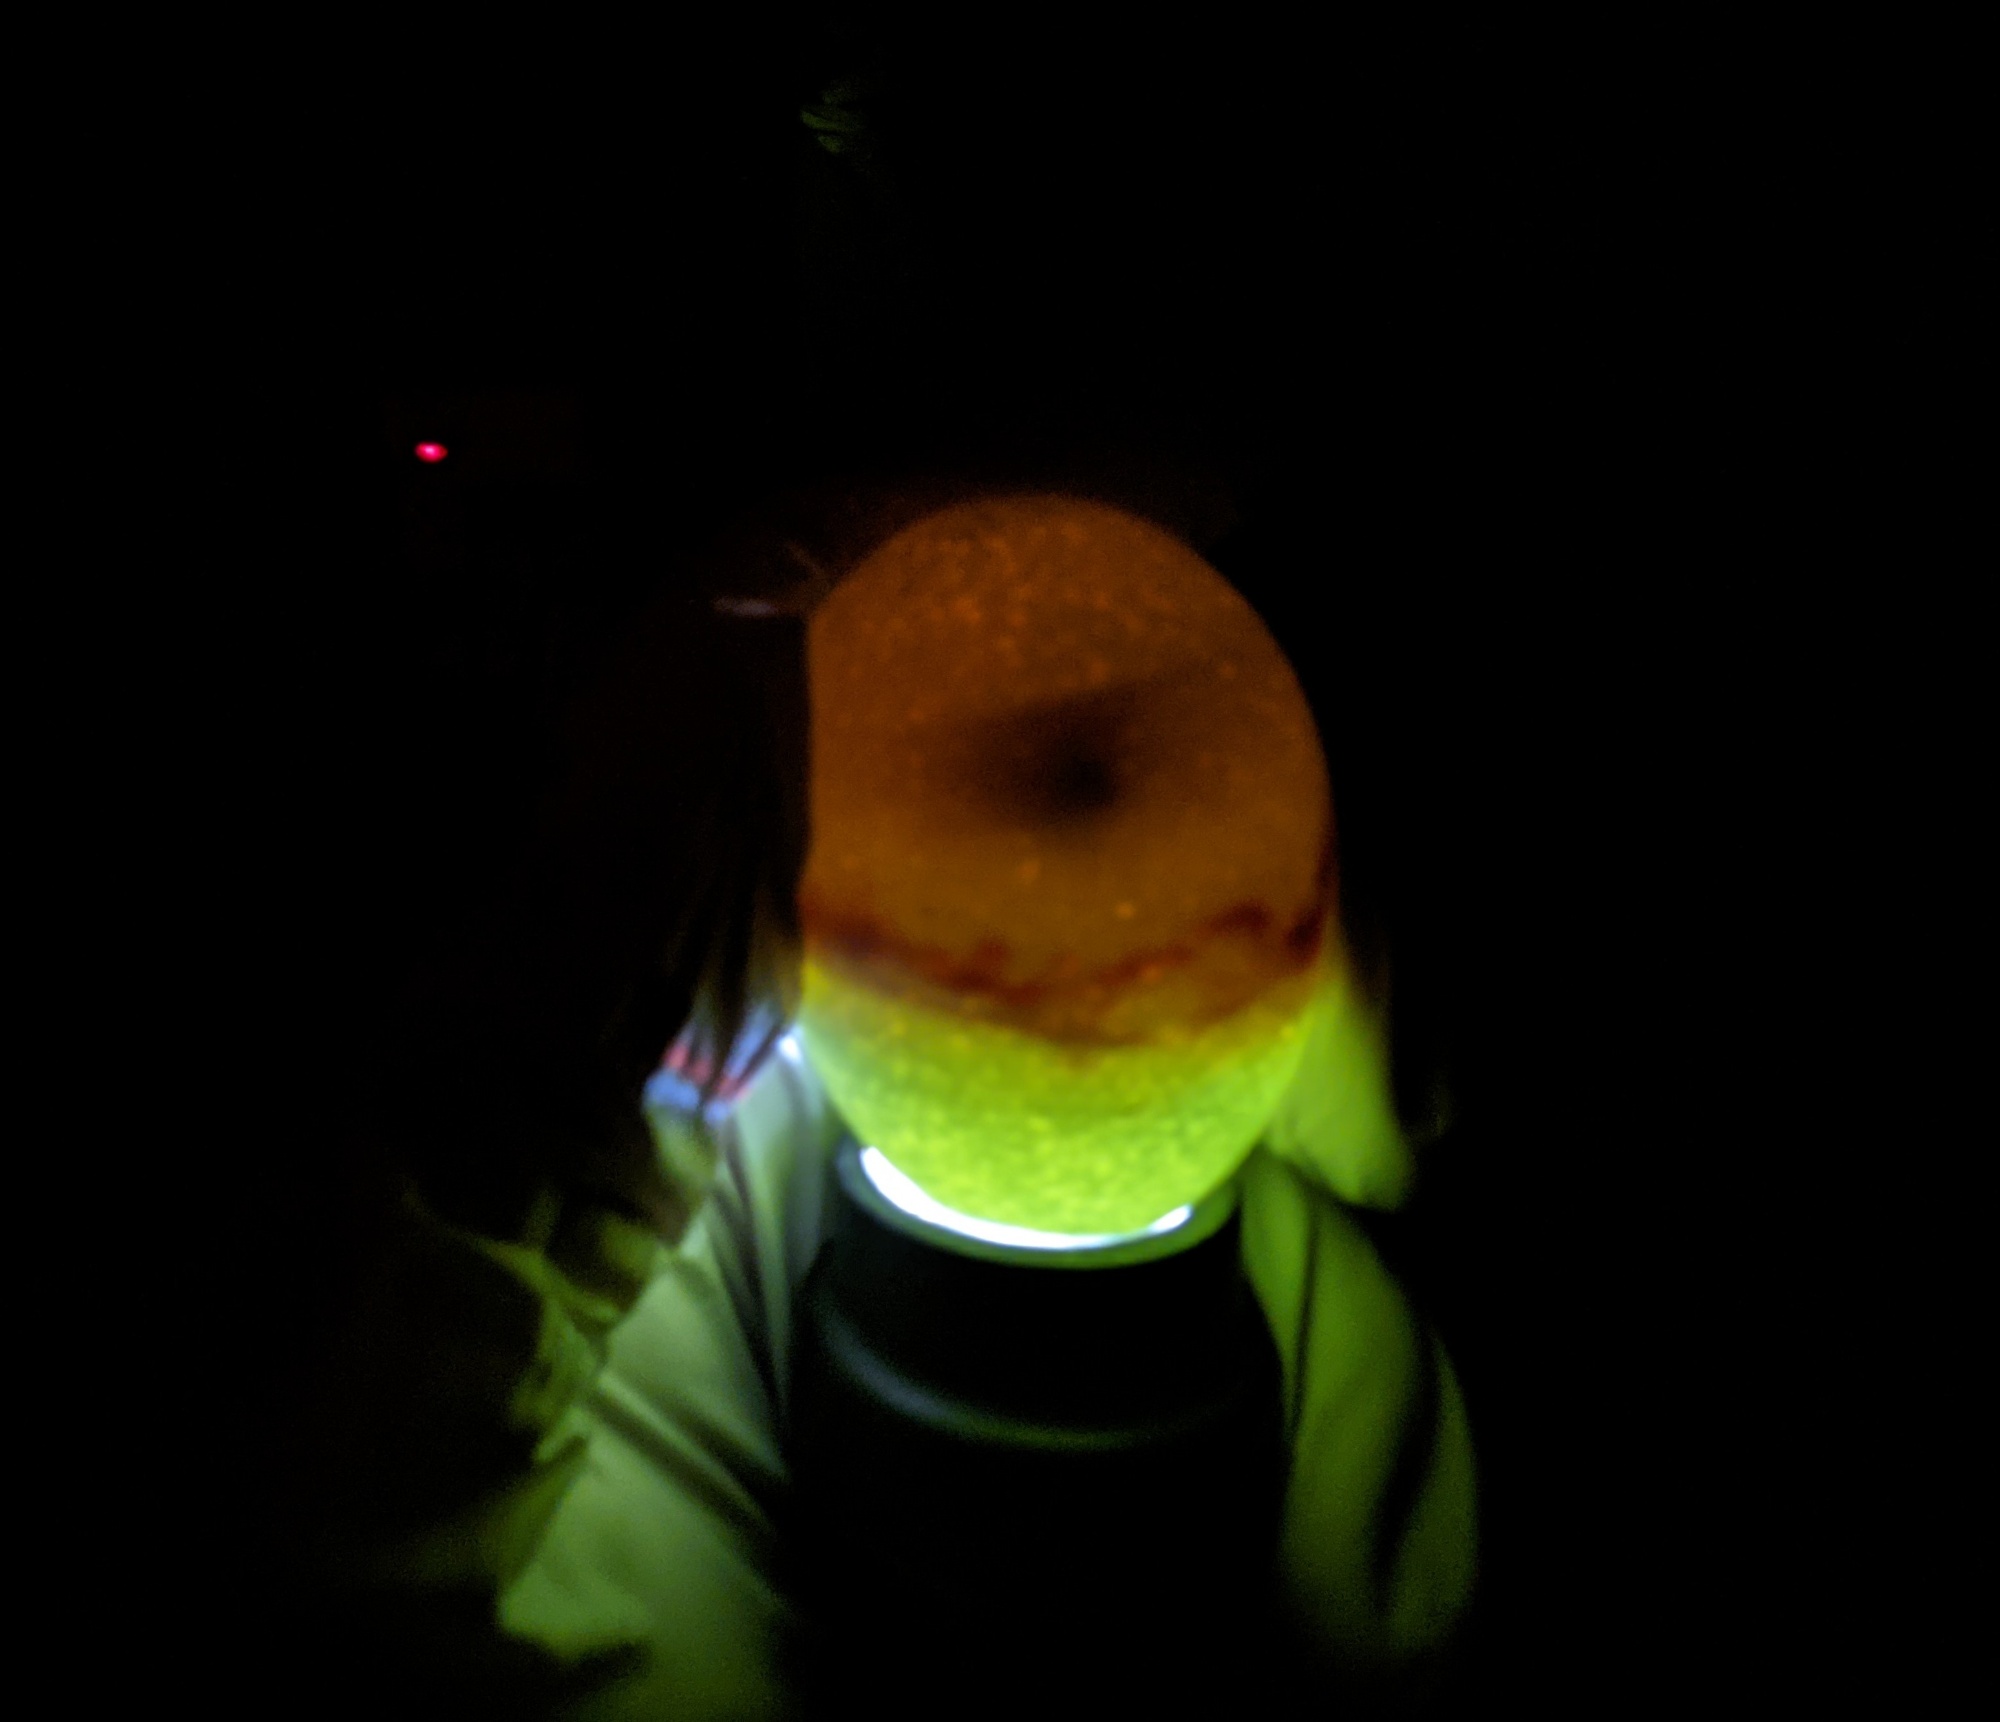
While I don’t usually candle undamaged eggs frequently at lockdown, I also know from experience that chicks from shipped eggs often need assistance to hatch. The only chick that hatched from the first group was assisted, as it was malpositioned. When I candled yesterday, I could see that the air cell had drawn down and it looked enormous, so I bumped the humidity up. This morning, when I tapped the egg, I could hear cheeping, and when I candled, I could see the chick’s beak moving in the air cell – an internal pip!
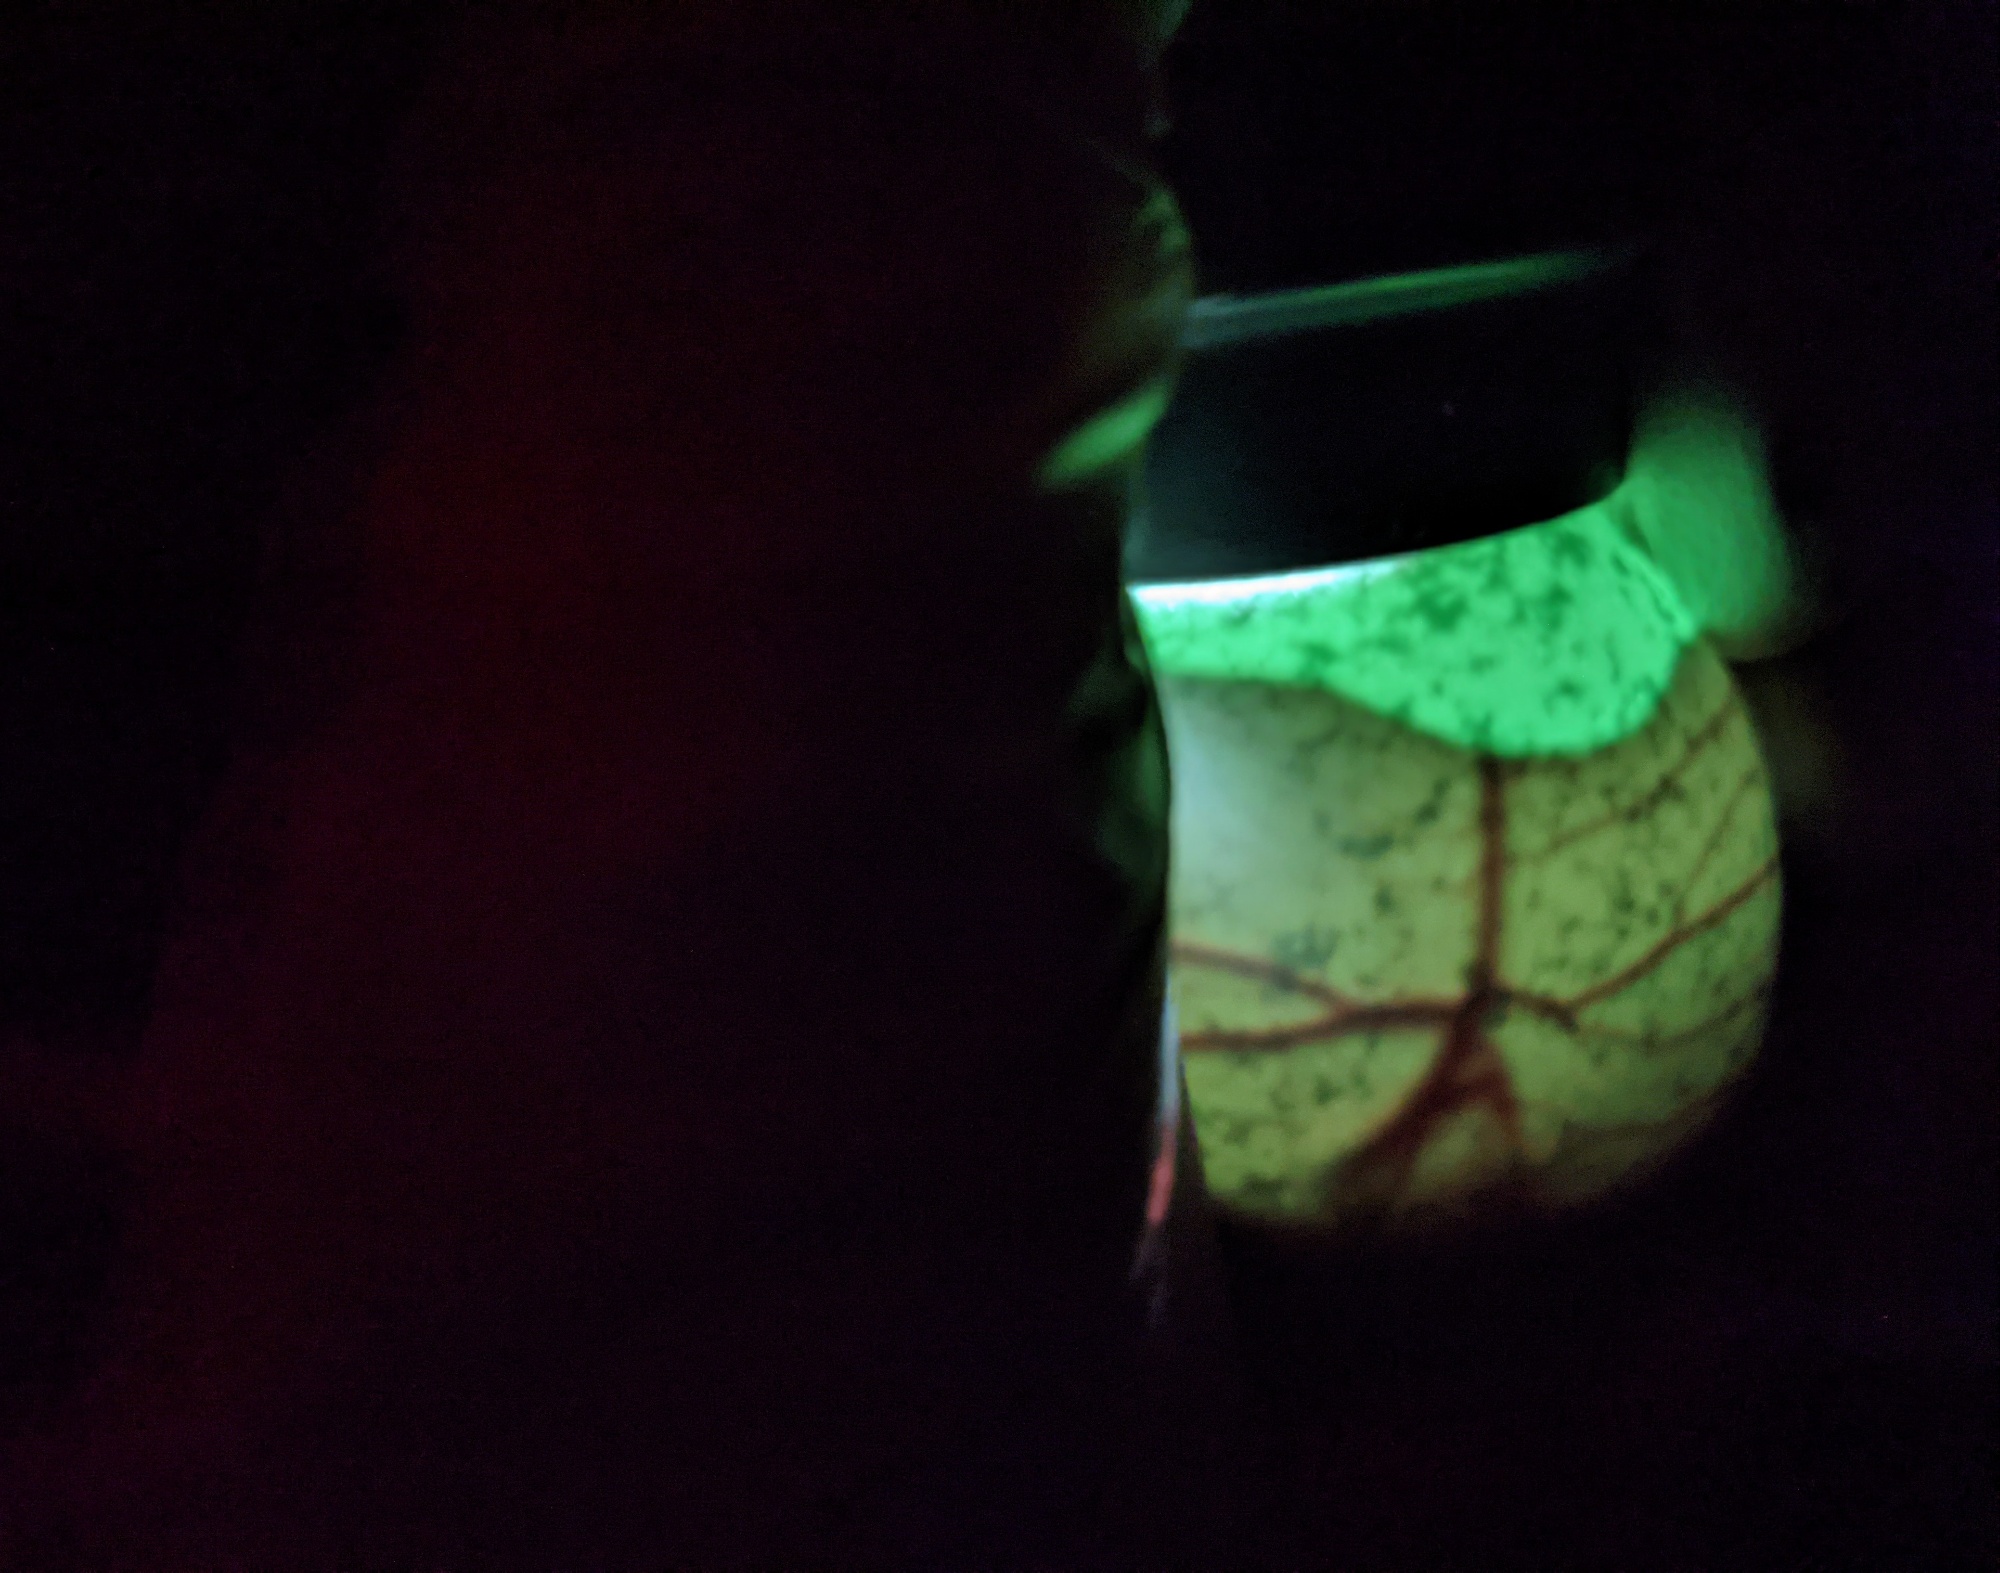
With “challenged” eggs like this one (or, really, any that are shipping-damaged), I may choose to expand beyond just making a safety hole to ensure the chick had adequate access to air, even if the hatch extends for more than a day or so. Knowing where the air cell was in relation to the chick’s beak, I carefully chipped a hole into the air cell and then, equally carefully, broke off small pieces of the shell to allow me to visualize the chick’s beak and the surrounding membrane.

Opponents of assisted hatching may protest that the chick had already breached the internal membrane and that a tiny “safety hole” should be sufficient to prevent the chick from running out of air, if any assistance is given at all. Maybe – but I prefer to examine the membrane to determine hatch readiness (this one has active blood vessels in the membrane, indicating that it’s not ready and probably has a day to go – this is only day 20, so “hatch day” technically isn’t until tomorrow) and to gently clear the chick’s nares. The membrane can adhere to the nares and suffocate the chick, so I lubricate the membrane with coconut oil – this also reveals the blood vessles – and push the membrane away from the nares until they’re clear.
When a chick still has active blood vessels, it’s important to avoid damaging them, or bleeding (sometimes fatal) may occur. When I’m chipping away shell in the air cell to reveal the chick, I do so very slowly and only where the membrane is no longer attached to the shell. In addition, caution must be exercised when pushing the membrane away from the beak to avoid tearing the membrane and causing bleeding. My mantra is to go slowly and incrementally, only where I can see what I’m doing, and stop immediately if any bleeding occurs.

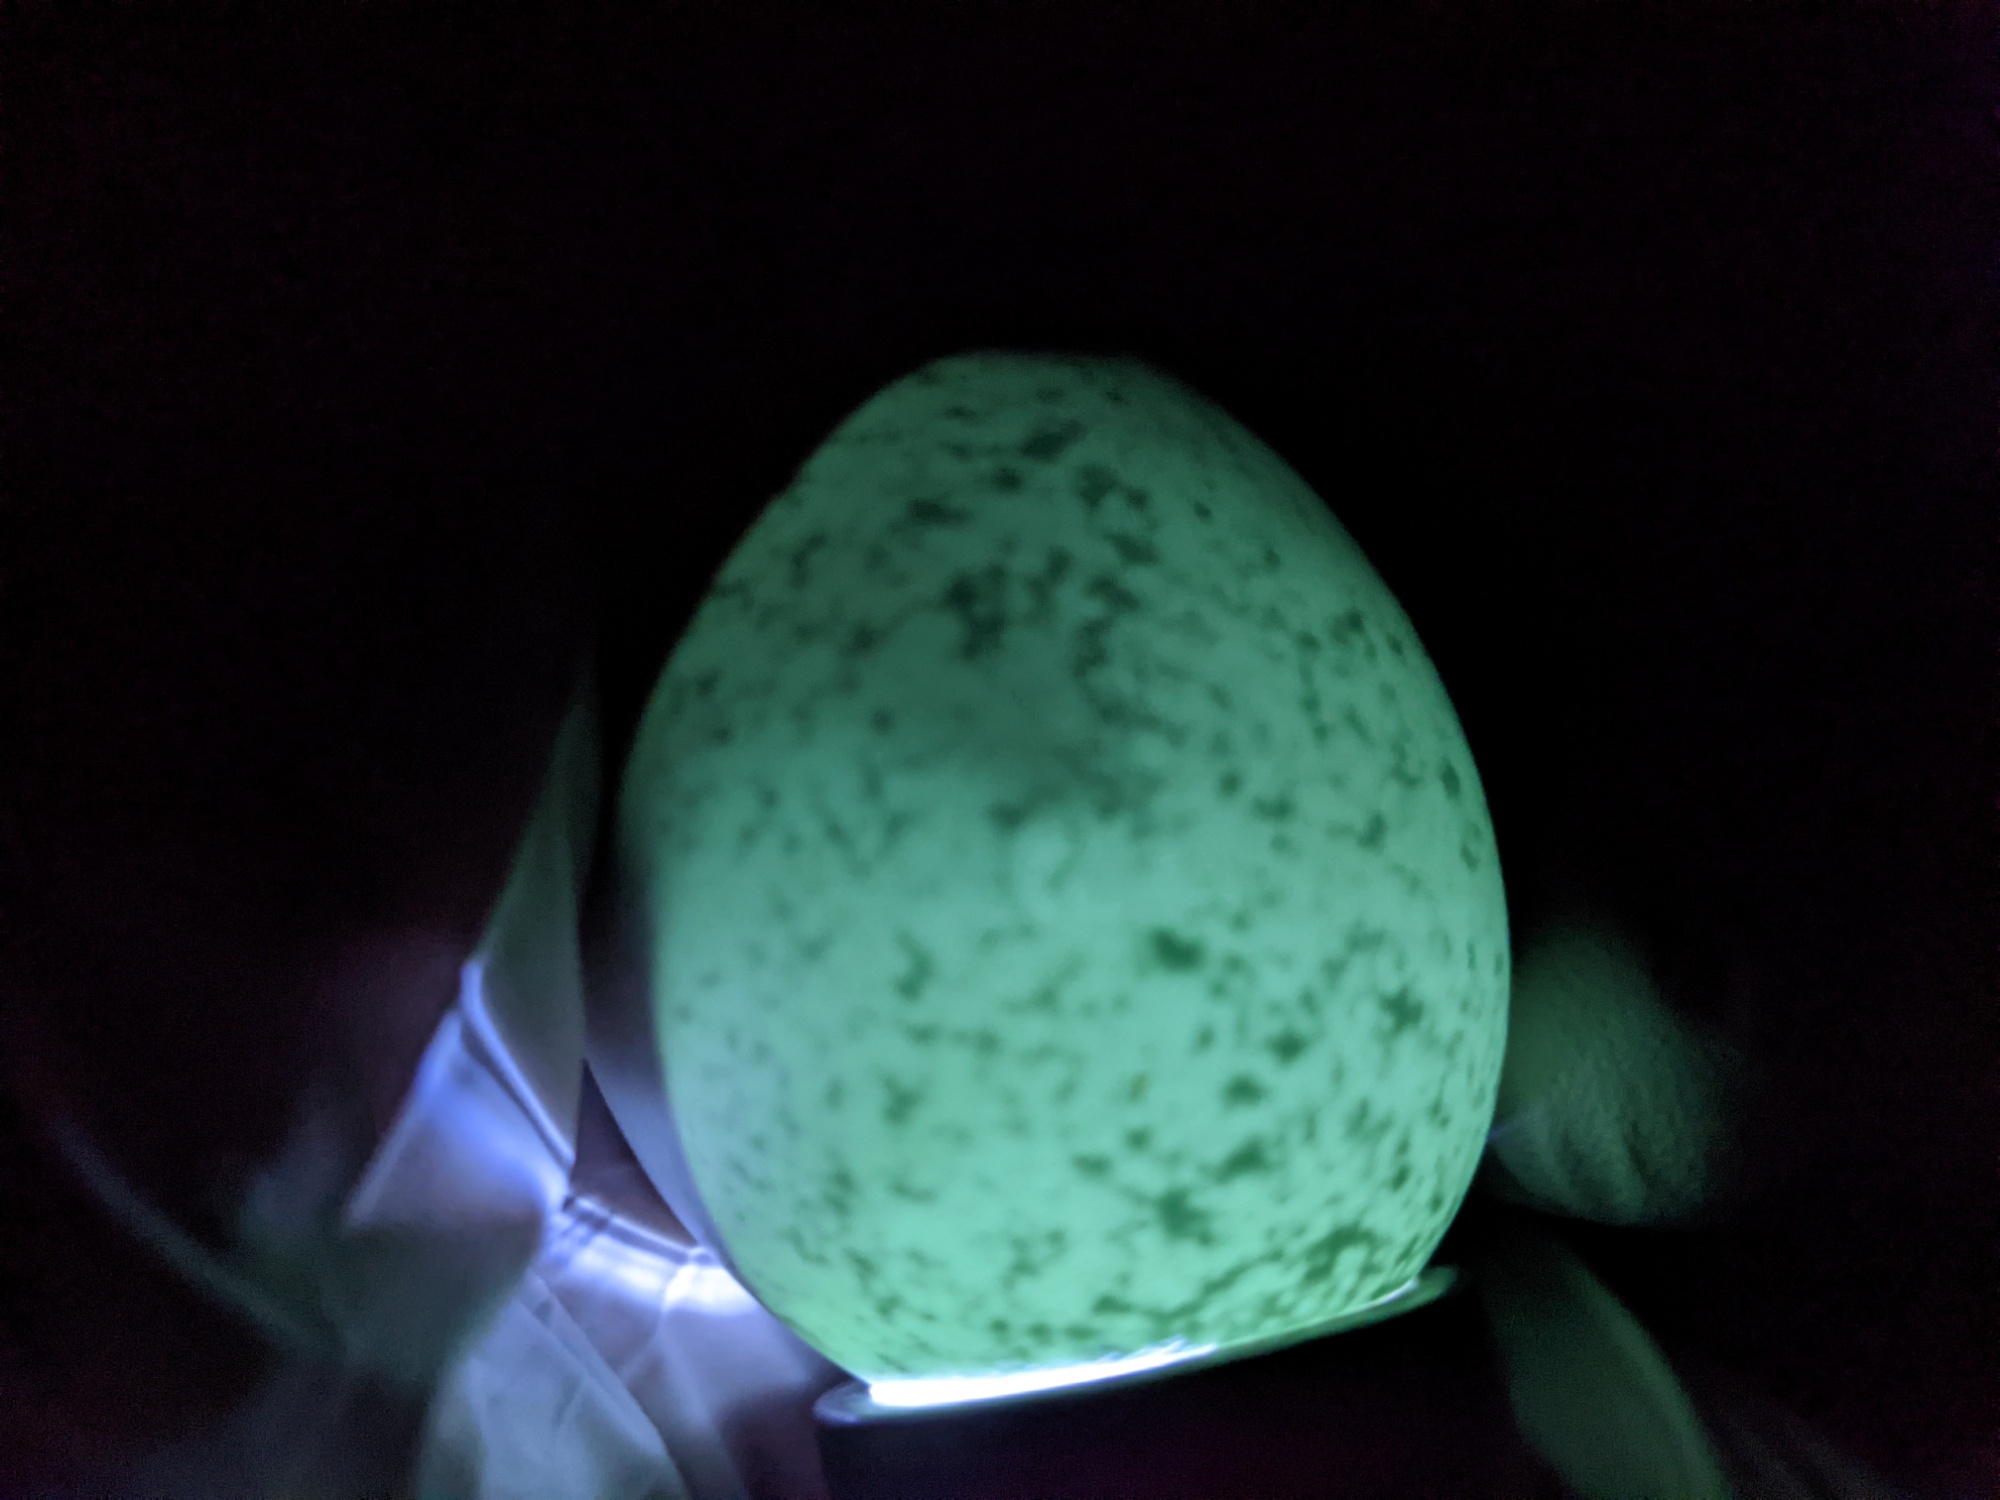
The chick can now take as long as it needs to absorb its yolk and hatch. I’ll keep the humidity high (65%+) so that the exposed membrane stays moist, and will monitor its progress in case it needs additional help. If all goes well, it may hatch sometime tomorrow.
Stay tuned for another update! Good wishes for the hatch are appreciated.