
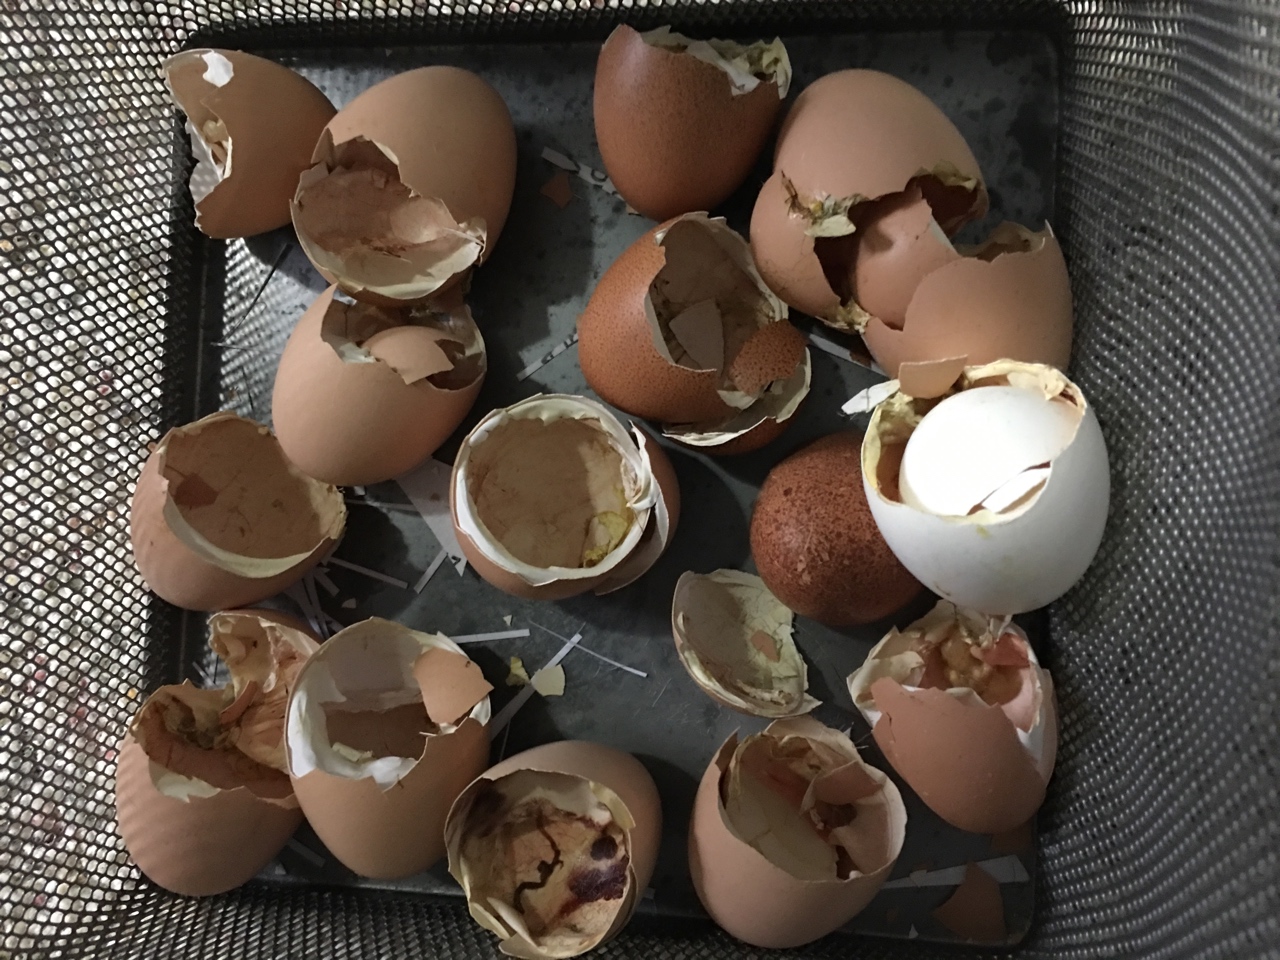
So the fun part of incubation is over: the chicks have hatched, and you’re looking at an incubator full of empty shells and hatching gunk. What now? Clean it, thoroughly. Keeping your incubator clean will help ensure that you have successful hatches and that your hatchlings will be healthy.
Supplies you’ll need to clean a styrofoam incubator:
- Household bleach
- Dishwashing liquid
- Alcohol wipes
- Cotton swabs (preferably the long ones)
- Soft-bristled toothbrush
- Can of air
- Paper towels
- Rubber dishwashing gloves
Here’s how we do it:
Bottom pieces
- Put on the rubber gloves to protect your hands.
- Remove the top of the incubator and set it aside (it will be cleaned separately).
- Empty the bottom of debris and water that remains in the channels. Wipe it out with paper towels as needed – the goal is to remove as much of the solid debris, especially eggshell fragments, as possible.
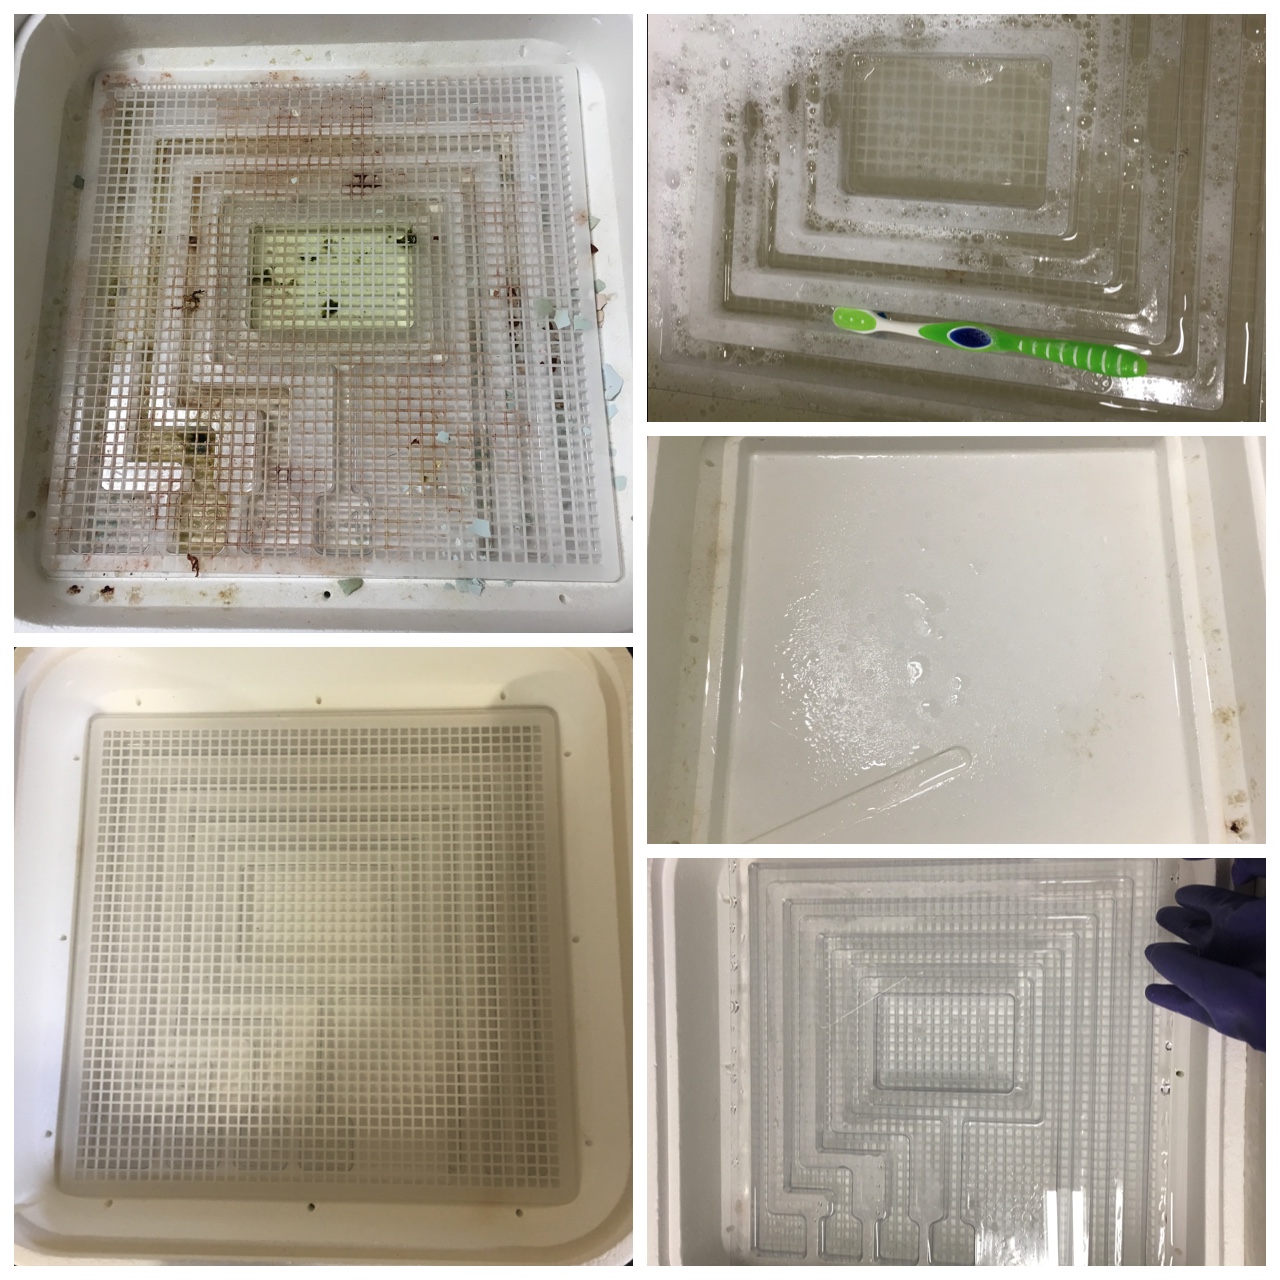
- In a utility sink or other large sink, rinse out the bottom of the incubator, including the plastic tray and the mesh screen that sits on the bottom, then submerge these pieces in warm soapy water to loosen any dried-on gunk.
- Gently spot-scrub any tough stains in the bottom piece of the incubator with a soft-bristled toothbrush, taking care not to damage the styrofoam.
- Insert the cotton swabs into the air holes in the bottom styrofoam piece to gently push out any shell fragments that may be in there.
- With a plastic-bristled brush, scrub the mesh screen well to remove stains and debris.
- Run the soapy toothbrush down the water wells in the plastic “catch” tray to remove debris.
- Rinse all three pieces thoroughly in warm water to remove all remaining soap residue.
- Fill the sink with warm water and add about 1/4 cup of bleach. Submerge the three pieces of the incubator bottom in the bleach water. For tough stains in the styrofoam, put diluted bleach directly on the spot and allow to work for at least a couple of hours.
- After several hours, rinse all three pieces thoroughly in water to remove any remaining bleach.
- Take the pieces outside and place in the direct sunlight to allow for ultraviolet disinfection.
- Once dry, bring the bottom back inside to be stored until the next hatch.
Top piece
- Wipe all inside surfaces with alcohol disinfecting wipes.
- Blow out fan area with can of air.
- Wipe any visible dust that remains in hard-to-reach areas with a cotton swab.
- Place the top piece back onto the bottom, leaving the incubator slightly open for air flow.
Do you have a plastic incubator, like a Brinsea? Since I only incubate in mine, I just wipe the plastic base and underside of the lid with alcohol wipes to disinfect it between batches. If you hatch in yours, you’ll want to thoroughly clean the base and blow the fluff out of the fan before using it again. You can keep your incubator cleaner by using a designated “hatcher”, another incubator that you move the eggs into at lockdown: hatching messes will be contained to the hatcher and you can keep incubating eggs in your other incubator. Using a designated hatcher will also allow you to do staggered hatches of eggs with different hatch dates.
While cleaning out a gunky, possibly smelly (depending on how long the hatch takes) incubator may not be the most appealing prospect, it really is easiest to do it immediately after the chicks have been removed. Seriously, just do it right now – don’t wait until later because it won’t get any easier, and prompt cleaning will help prevent harmful bacteria from proliferating. Plus, once your incubator’s clean again, it’s ready for the next batch of hatching eggs, so that should be incentive enough!