
 The second batch of Muscovy eggs in the incubator should hatch in about 2 days. While they have a reputation for being difficult to artificially incubate, there is excellent information readily available to first time incubators from Muscovy enthusiasts who have experience incubating these eggs. “Lessons learned” shared by others can save you a lot of grief.
A few fundamentals that seem to be working: (1) use (unwashed, unrefrigerated) eggs that are as fresh as possible, (2) hand turn eggs at least once a day, (3) “dry” hatch, and (4) mist/cool after day 10. Expanding on each:
(1) When we set our first batch of Muscovy eggs, the girls had just begun laying, so some were unusually small and others may have been pushing the two-week threshold. We had 2 dead-in-shell (not pipped) and 3 needed assistance hatching. We were eager to get a dozen into the incubator since the incubation period is so long (35 days), so we included some that we probably wouldn’t have now.
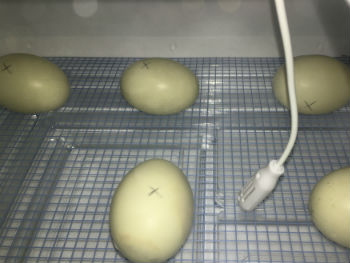
(2) With the first batch, we hand turned the eggs 3 times a day. You just mark an “X” on one side and an “O” on the other so you know you’re making a 180 degree turn. Be sure to alternate the direction in which the eggs are rotated, too. With this batch, we started the autoturner after 24 hours and hand turn once a day. We’ll see if this impacts the hatch at all.
(3) Last hatch, we kept the relative humidity (RH) in the low 40% range. We’ve gone even lower with this hatch, rarely exceeding 40% and staying right around 36% or so, on average. Other incubation sources indicate that too-high humidity can cause late stage death prior to hatching (duckling is too large to position itself properly for hatching), so we’ve carefully monitored the RH to ensure it remained in the desired range. The weather conditions have really made keeping the humidity consistent a challenge with this batch, though – adding just a little water every couple of days and even removing some water once has been necessary. Feels like we’ve been constantly fiddling with it. The hatcher’s humidity will be maintained at 65%+ to facilitate smooth hatching.
(4) The last batch was misted and cooled daily, after day 10, for ten minutes. With this hatch, we’ve done the same except that the cooling period has been extended to 15 minutes in the week prior to lockdown.
One change to the process we’ve implemented with this hatch is to add a second incubator as a hatcher. It’s a still air hatcher, which should dry the hatching eggs out less than the circulated air incubator. In addition, it’s much larger – we should see fewer situations where eggshell from a hatchling is stuck to unhatched eggs. We’ve lost chicks this way, when the external pip (air hole) has been sealed off by a piece of shell from a recently-hatched egg. Another compelling reason for using a hatcher is that the mess from hatching will be contained in an easy-to-clean unit, rather than an incubator with a secured fan housing…and hatches are messy. Eggshell and down/feather dust are blown everywhere in an incubator with a fan, and it creates a murky “soup” in the water channels. Cleanliness is important, though, so ease of cleaning is a bonus.
These eggs should hatch around the 19th (one duckling hatched a day early last time and then proceeded to run around, nibbling the feet of those still trying to hatch). Here’s hoping for a 100% hatch rate and very healthy and vigorous ducklings!