
In an earlier post, I introduced Makgeolli (막걸리), a Korean rice-based fermented beverage. It’s easy to make and very pleasant to drink (as long as you ensure that too much pressure doesn’t build in the bottle – if not, you may end up wearing it rather than drinking it!). This is a rice liquor: I’ve seen ABV ranges online from 3%-6%, possibly based on how diluted it is; regardless, there is more alcohol in this beverage than in probiotic drinks like kombucha or water kefir, but it’s not rocket fuel.
There are many recipes out there…my recipe is based on one posted by SteveHoward on HomeBrewTalk.com. The first time I made it, I added wine yeast, as the recipe suggests, and didn’t like the flavor of the finished product; I’ve since only made it with nuruk only, and the ferment is very active (no additional yeast needed to facilitate the ferment) and the finished product, lovely.
Here’s how I make it:
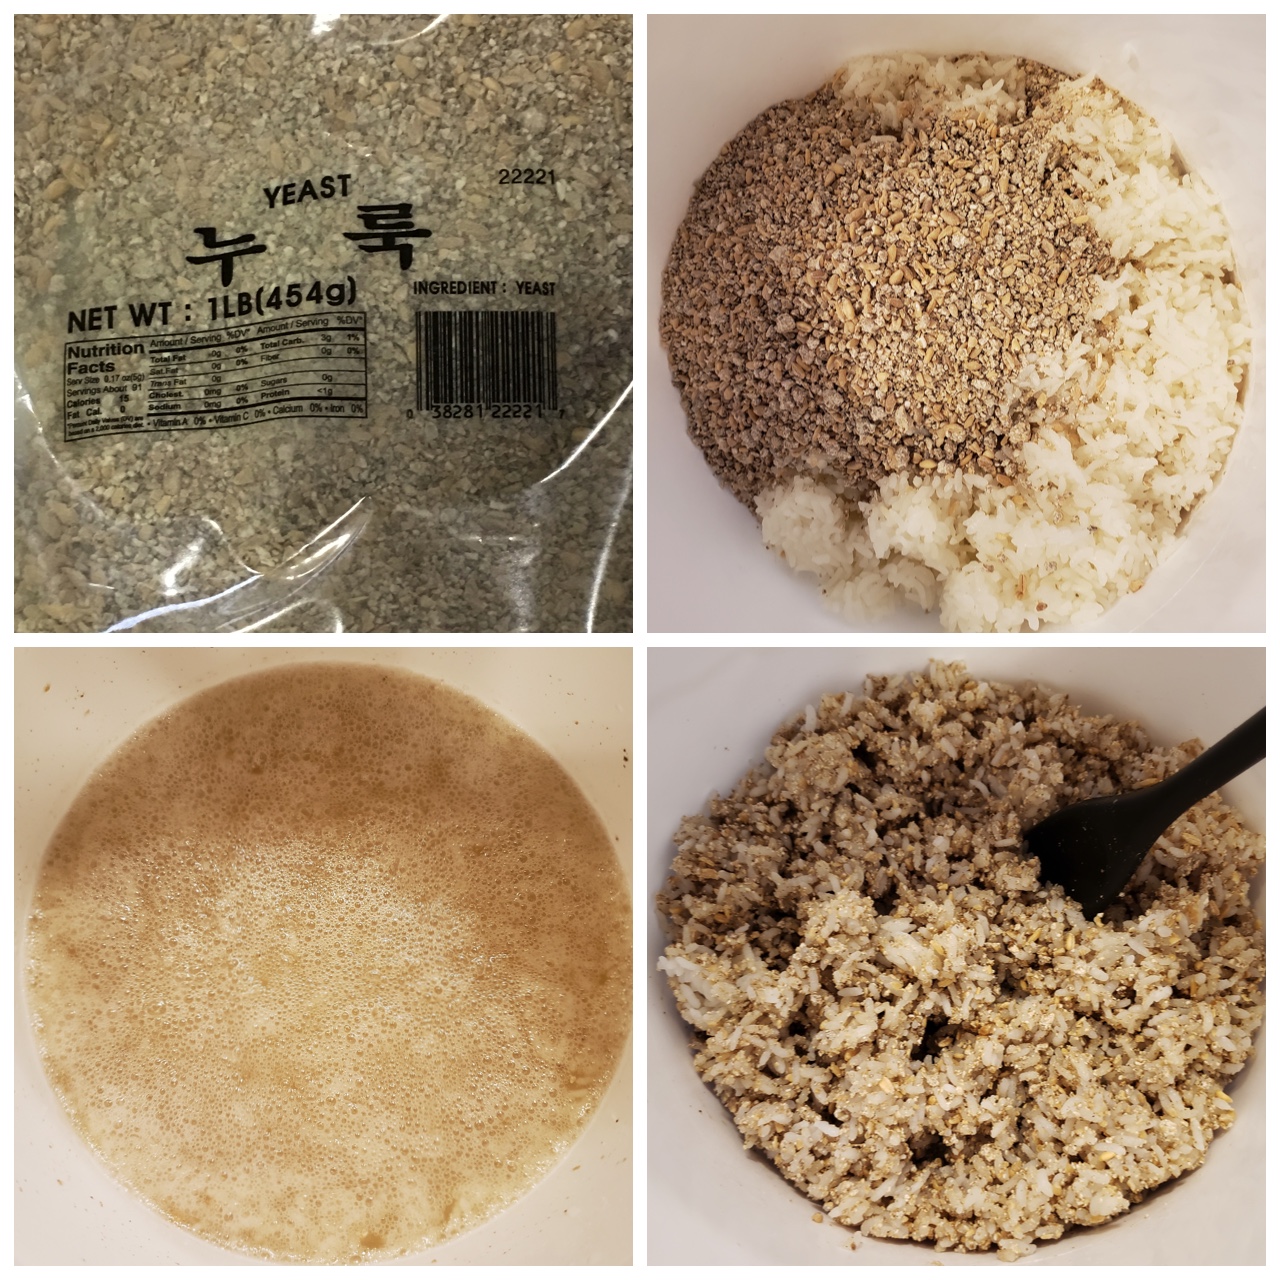
- Cook 2.5 cups of white rice (I just do it in my Zojirushi rice cooker).
- Allow the rice to cool completely. I just move it into my primary fermenter bucket, cover with a paper towel, and wait a few hours.
- Once cool, mix in about 1/2 pound of nuruk (누룩), the traditional fermentation starter. The rice must be cool or the resulting Makgeolli may turn out very sour. Mix it well, so that it’s fully incorporated into the rice. Nuruk contains a host of microorganisms like yeast, fungi, bacteria, and mold that are necessary to create Makgeolli. It is critically important to use nuruk when making this ferment.
- At this point, I also add about 3/4 cup white cane sugar and mix until dissolved.
- Add 11 cups of dechlorinated water to the mixture and stir well.
- Cover and stir at least once a day for the next 4 days. You should see signs of active fermentation (bubbles/foam) and it should smell slightly sour and yeasty.
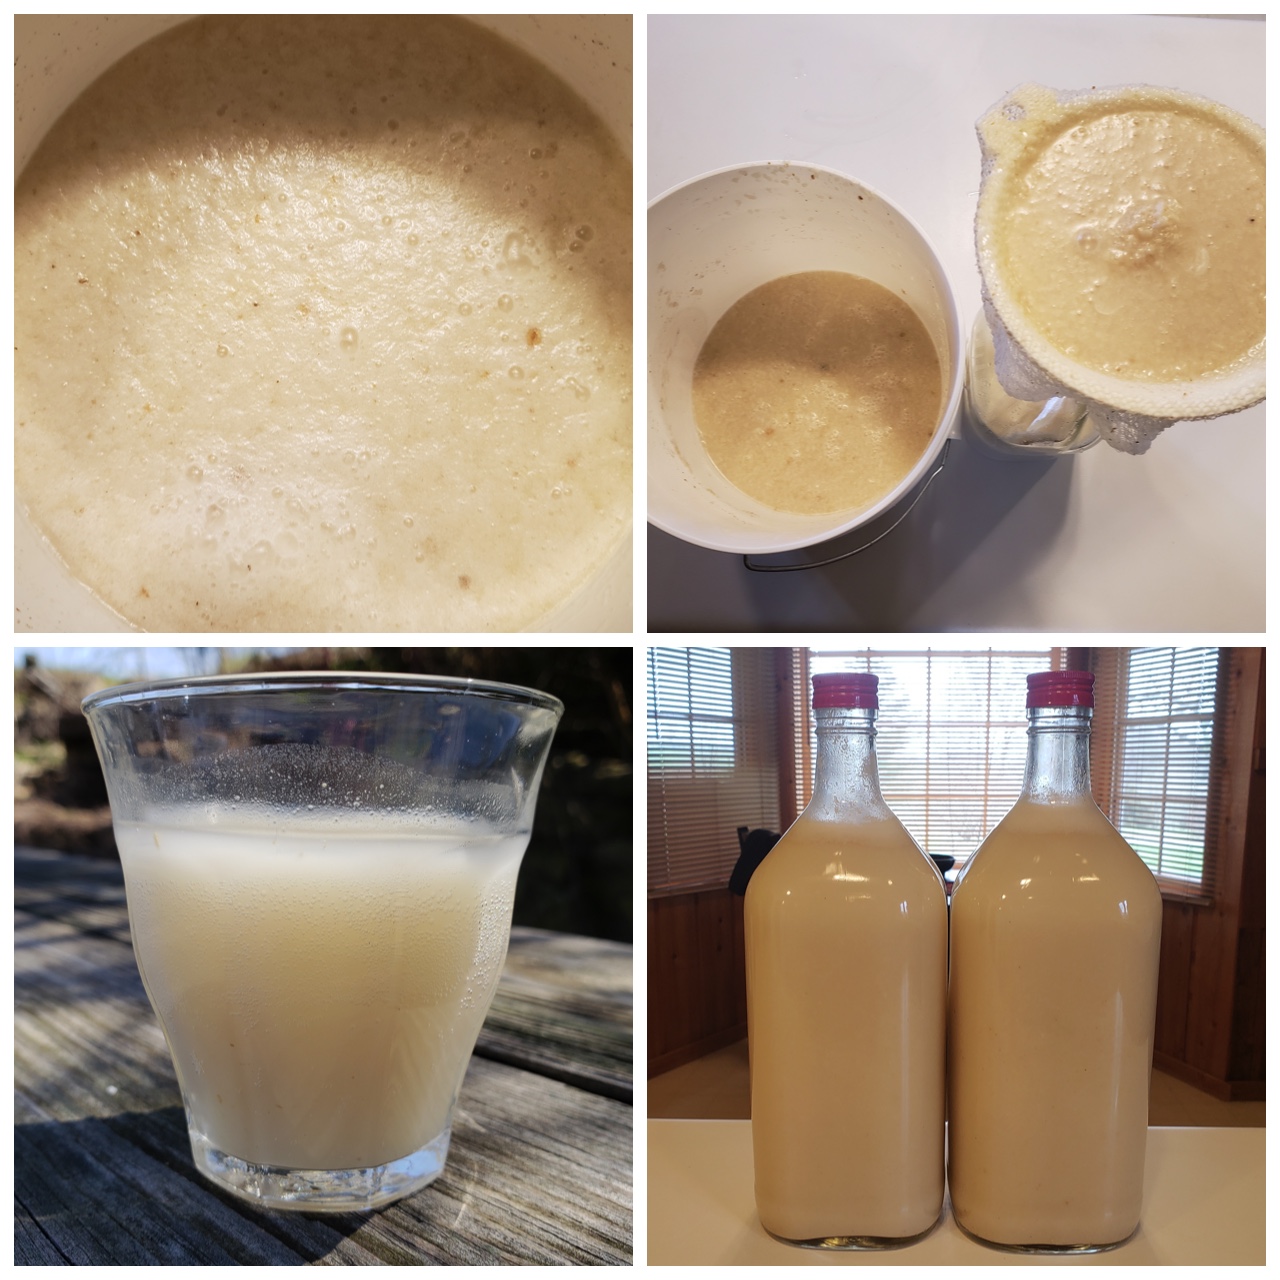
- Assuming the ferment has been active, move the Makgeolli into secondary fermenters. You will need to strain out the largest bits with something like a muslin bag or cheesecloth, and some of the more liquefied rice should remain in the liquid you’re bottling. Once strained, water should be added. I usually dilute at a ratio of about 3 parts makgeolli to 1 part water, depending on the Makgeolli’s consistency. Experiment with the dilution to find the level you like.
- Once diluted and bottled, let the Makgeolli do a second ferment for about 4-5 more days. Burp it regularly or use an airlock to keep the pressure under control. If it’s not sour enough for you, let it go longer…but taste it daily to ensure that it doesn’t cross into “unpleasantly sour” territory.
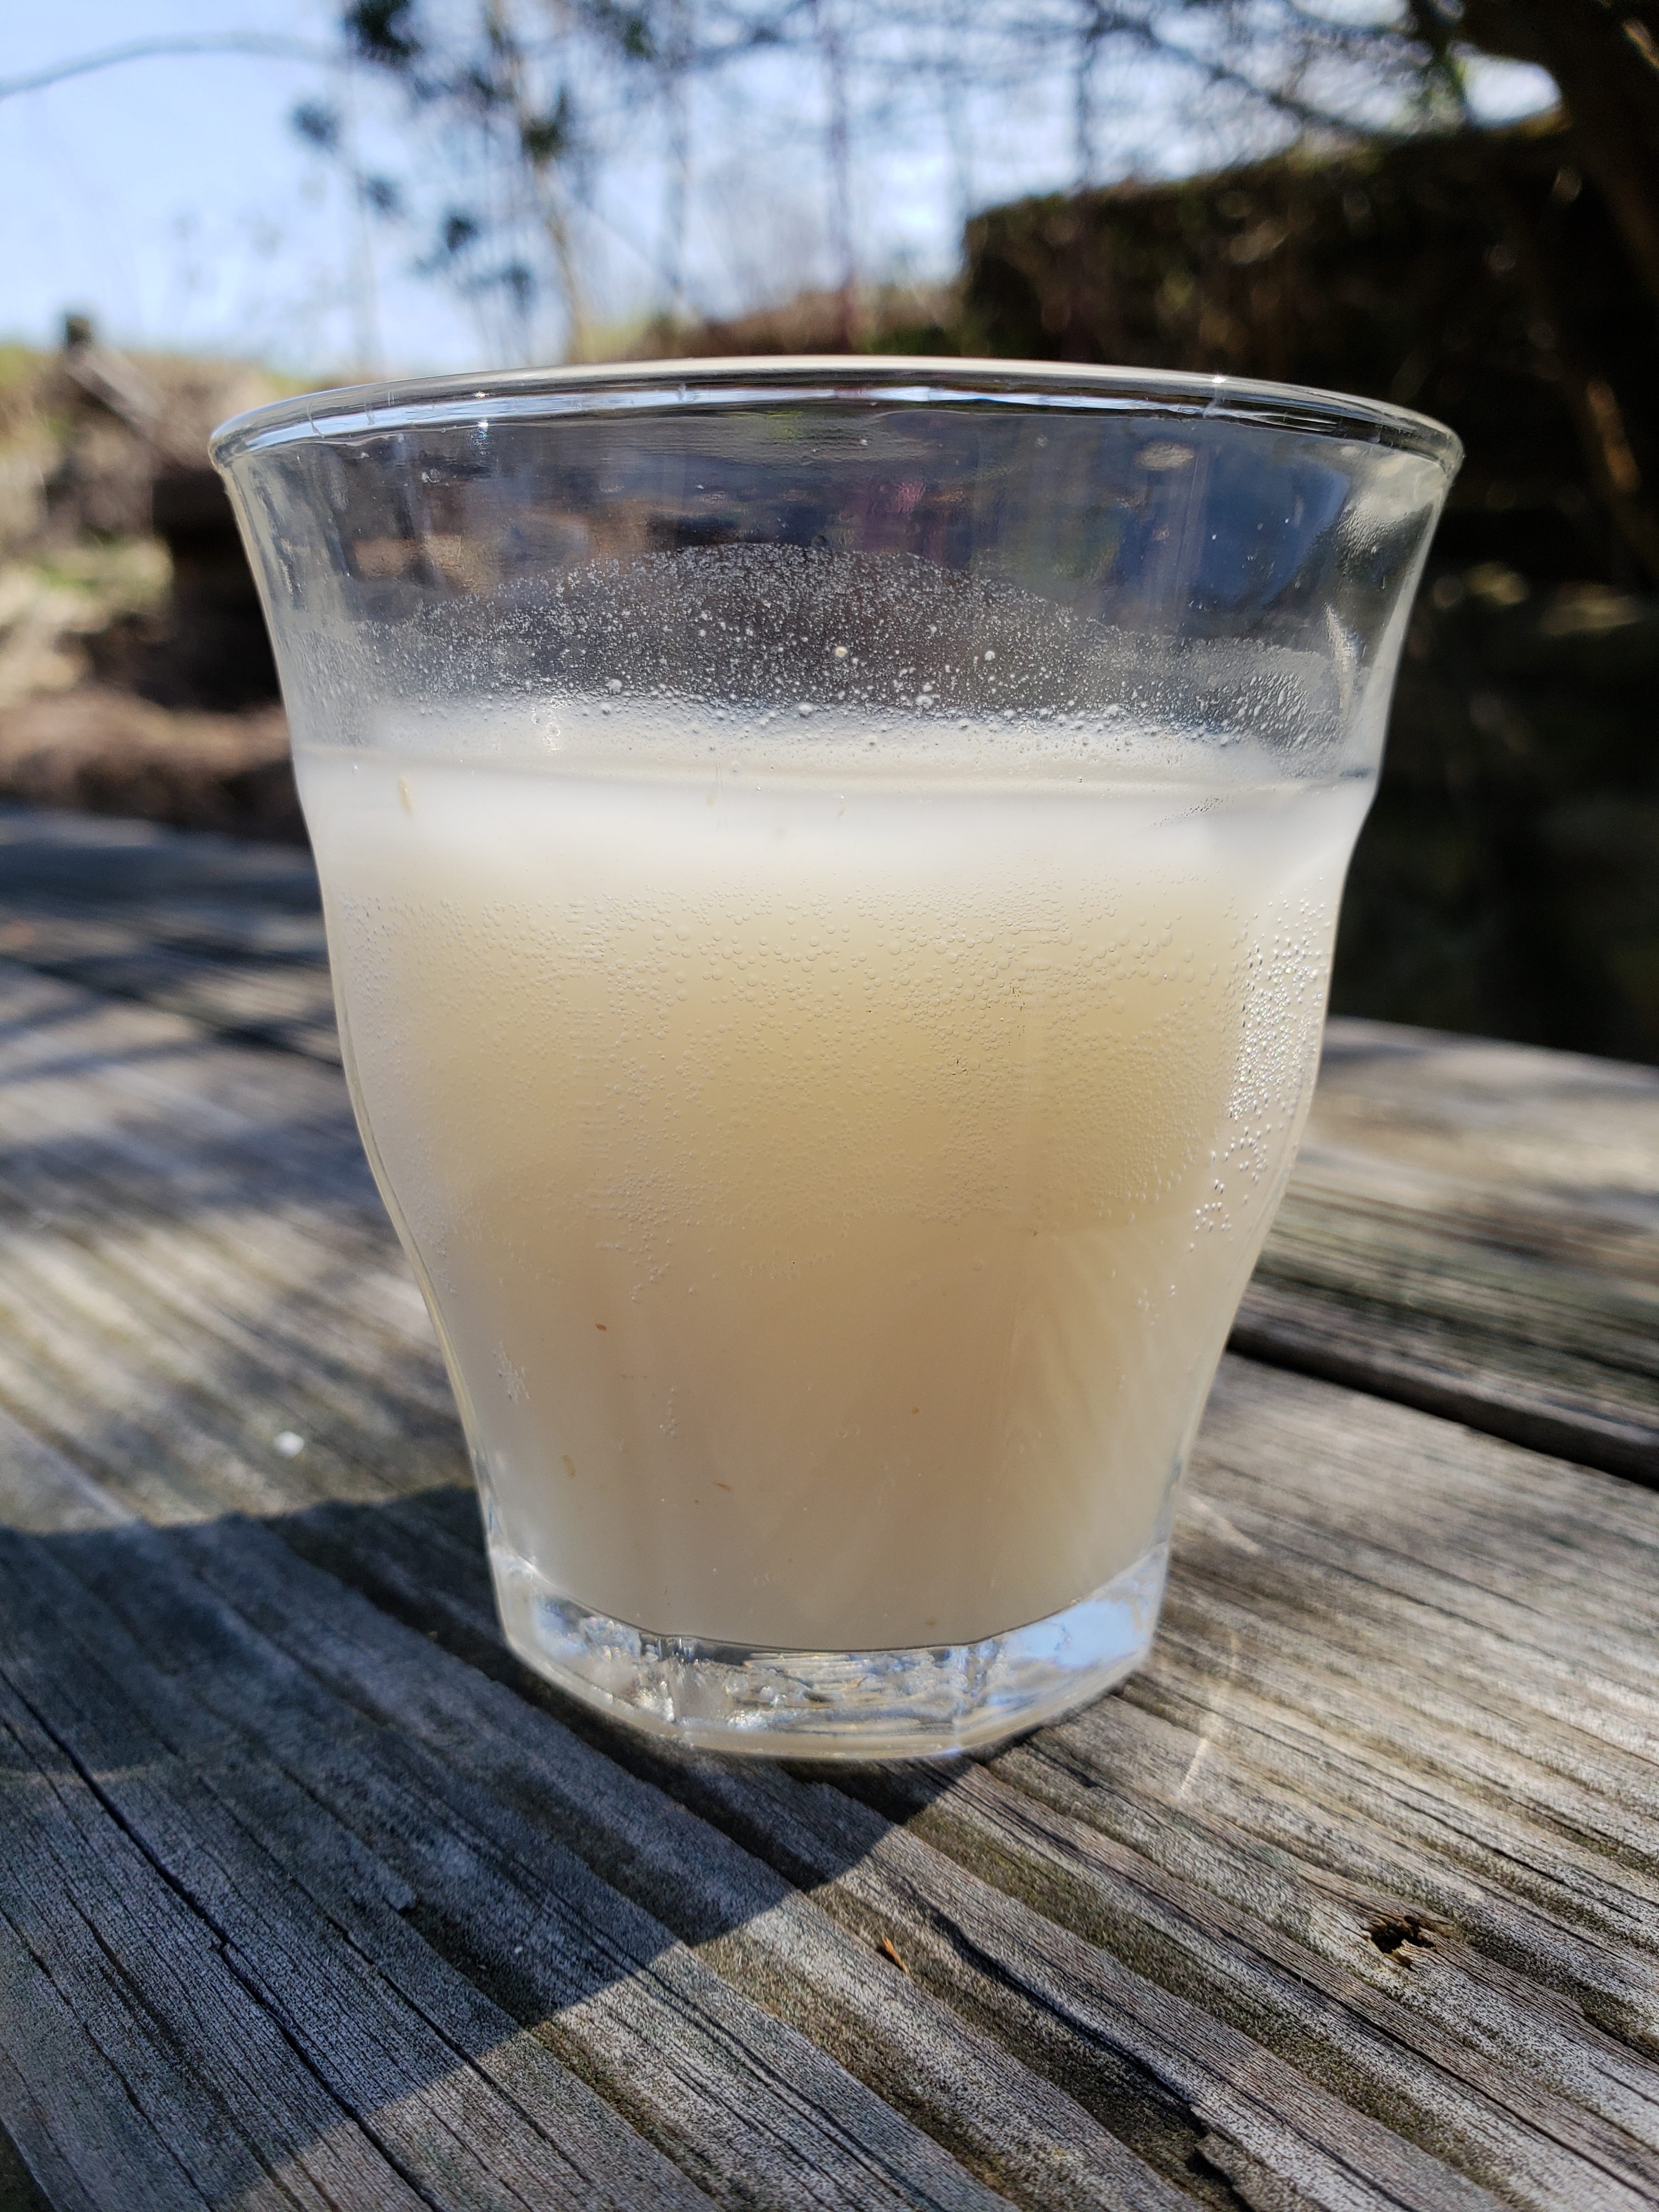
- Once it’s reached the right level of sourness and carbonation, refrigerate and enjoy! The liquid should be gently agitated before serving so that it becomes milky-looking and the rice particles are somewhat evenly distributed through the liquid. Keep burping it periodically, even if it’s in the fridge, to ensure that the pressure in the bottle is relieved.
Makes approximately a gallon, depending on how much water is added to dilute it. For more about Makgeolli’s history (and another recipe), check out Maangchi.com.
Did you make Makgeolli? Tell us about it in the comments!