
Spring is in the air and it’s time to get those constructions projects completed. The weather is just right: not too cold and not too warm, conditions that likely won’t last long. We needed to get the American Bresse and Black Copper Marans pullets and cockerels into breeding pens, so we broke out the new table saw and starting creating a lot of sawdust.
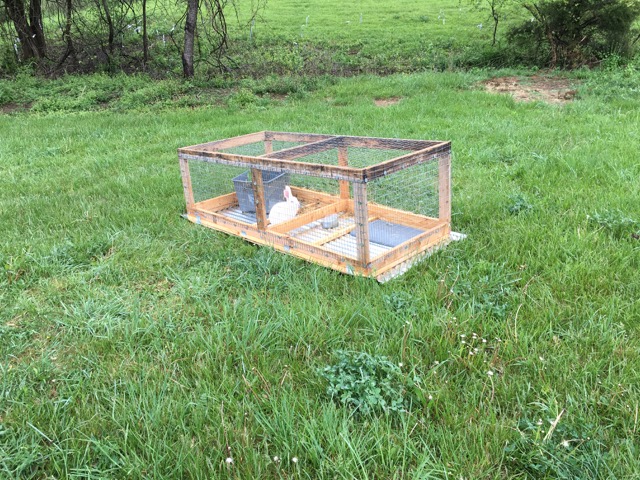
We used our plans for rabbit tractors as our template, but as with the rabbit tractor iterations, we modified the plans slightly to better suit our goals. These pens are wider and longer than the rabbit tractors, though they share the same general design (plus, if the breeding pens don’t work out the way we intended, we can easily convert them into rabbit tractors). Another difference is that the breeding pens are open on the bottom so the chickens can scratch in the grass – the rabbit tractors are wired all around to prevent digging out.
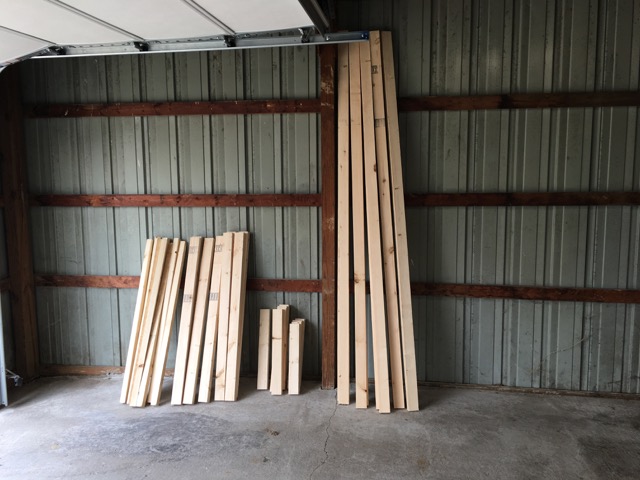
The starting point was ripping all the lumber – 2x6s and 2x4s – in half. For earlier projects, we purchased 2x4s and 1x1s at lumber stores and ended up (literally) wrestling the pieces into place due to the crowns and twists in the wood. Ripping down the lumber we selected allowed us to choose pieces that were straight to begin with, resulting in very little wrestling later. After we cut the lumber to our measurements, we had a nice pile stacked against the wall.
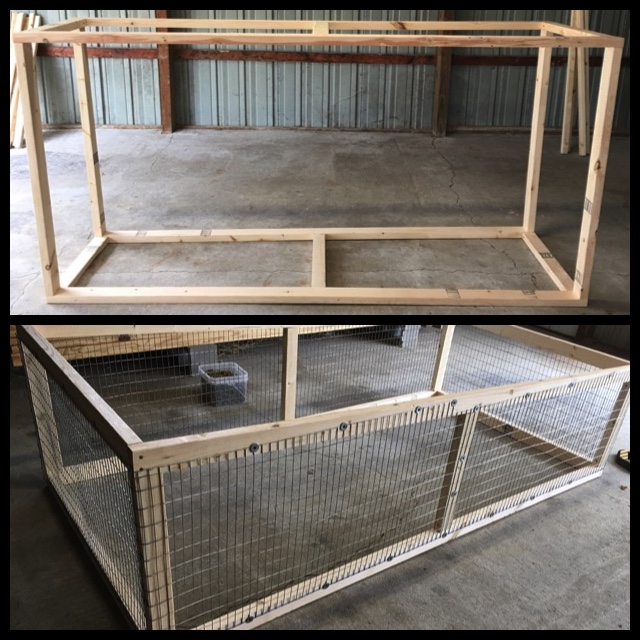
The next step was to put it all together. We began by creating the base and adding supports. Once the frame was complete, our favorite part was next – attaching the wire. Working with wire can be frustrating (like when you discover there’s a flaw in the wire that you’ve already attached to most of the structure) and there’s quite a bit of wrestling involved in this part of the construction because the wire isn’t dimensionally exact; while it may say it’s 1×2 wire, at least some of it will be slightly off those dimensions and the result will be that you’ll have to tug it into place and/or do a lot of cutting. And the cutting is a drag – the wire is sharp and can be under tension, so caution (and gloves) should be used when working with it…or you may get your fingers pinched or punctured. You had no idea this was so dangerous, right?
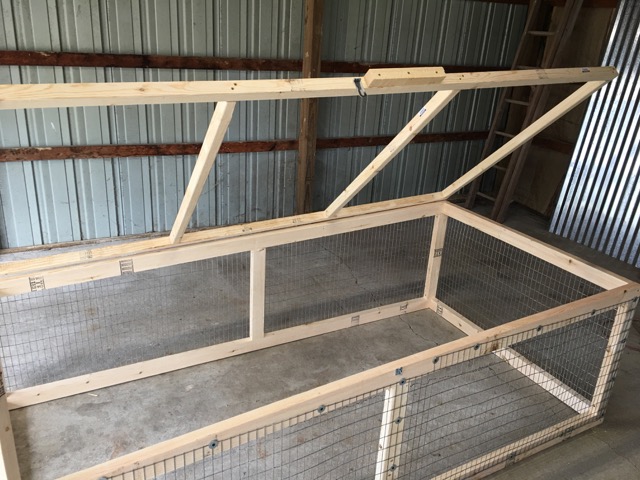
Once the wire is attached, making the frame for the lid is next, then the hinges and latch are added. Once the frame is complete, the metal roofing is attached with special screws. The final step is to add eyebolts that will be used to anchor the tractors to the ground. You say that sounds like overkill? We learned that sometimes the wind is freakishly strong out here and can actually flip a rabbit tractor over. Better safe than sorry – since these pens are bottomless, the chickens would be at the mercy of the weather and predators if the pen lifted off…and everything seems to love our chicken.
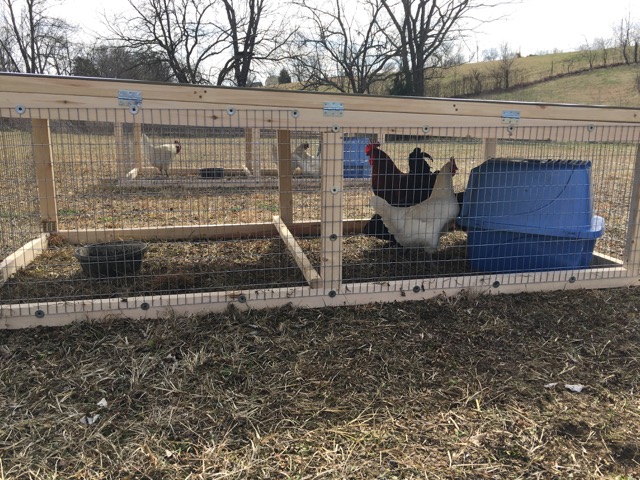
We’ve previously mentioned that you can really get your workout on the farm, and moving the pens is a good example. Since we want to have the breeding pens follow the rabbit tractors, and the rabbit tractors are – of course – at the back part of the property, we got to carry the two breeding pens all the way out there. It’s really quite a workout for your trapezius muscles. Once the pens were in place, we rounded up the pullets and selected the cockerels that would be in each. The Marans group (with one Bresse pullet, to keep the numbers even) settled in quickly, but the Bresse pullets look like they’re going to be a handful for the cockerel.
Soon, we’ll have pure American Bresse ad Black Copper Marans hatching eggs and chicks available – the point of this breeding pen exercise. We’re curious about what a Bresse/Marans cross will look like (and taste like), so if you’re curious, too (or just want to see cute chick photos), stay tuned for updates!
Comments are closed.