

With spring upon us, the geese have been laying with enthusiasm. Though the laying season is short – really, just a few months – they provide plenty of big eggs. We’ve had them scrambled and in custard rice pudding…so why not hard-boiled? And why not in the Instant Pot (IP)?
First, let me say that I adore my electronic pressure cooker. I use it nearly every day, often multiple times a day. I have various sizes – from 3 quart, my favorite, to 10 quart – and they each serve a specific and necessary purpose. Are you wondering what I would possibly need a 10 quart pressure cooker for? Among other uses, we regularly cook homemade dog food in it, and it’s the perfect size to make nearly two weeks’ worth of meals for our girls. But I digress…since I am so enamored of my IPs, I try to find recipes that are intended for them (and, barring that, I adapt stovetop or slow cooker recipes).
In this case, I already knew that I could make hard-boiled chicken eggs in the IP. When I searched for hard-boiled goose egg pressure cooker recipes, I came up with a goose egg: the recipes were for stovetop cooking. Well, that wouldn’t do.
Since I’ve raised ducks (and enjoyed their eggs, too), I knew that goose eggs were more similar in size and composition to duck than to chicken eggs. Having found a recipe for hard-boiling duck eggs in a pressure cooker, I knew it would – with some tweaking – work for goose eggs, too.
The first step was to wash the eggs thoroughly. It’s been a muddy start to spring, and the geese have delighted in playing in the mud…so their feet are muddy, and that means their eggs get muddy, too. Fortunately, a good scrub under hot water reveals the true beauty of even the muddiest egg.
Once the eggs were washed, I put a cup of water into the inner pot of my 3 quart IP, followed by a small metal trivet on which the eggs would rest. In my initial run, I cooked four eggs.
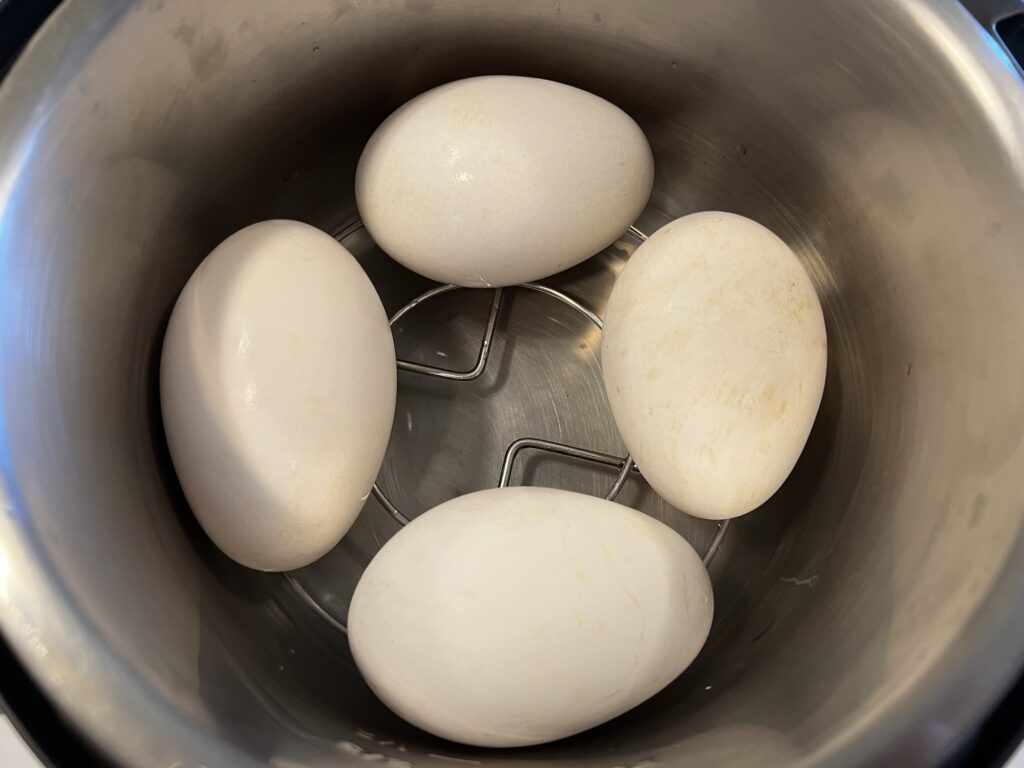
Guessing at the amount of time that would be needed, I closed the lid securely and set it to cook on Manual for five minutes. When the cooking time was up, I allowed a natural release for another five minutes, then manually released the pressure. I use a silicone steam diverter when releasing steam manually, so I can direct the hot steam away from both me and the cabinets.
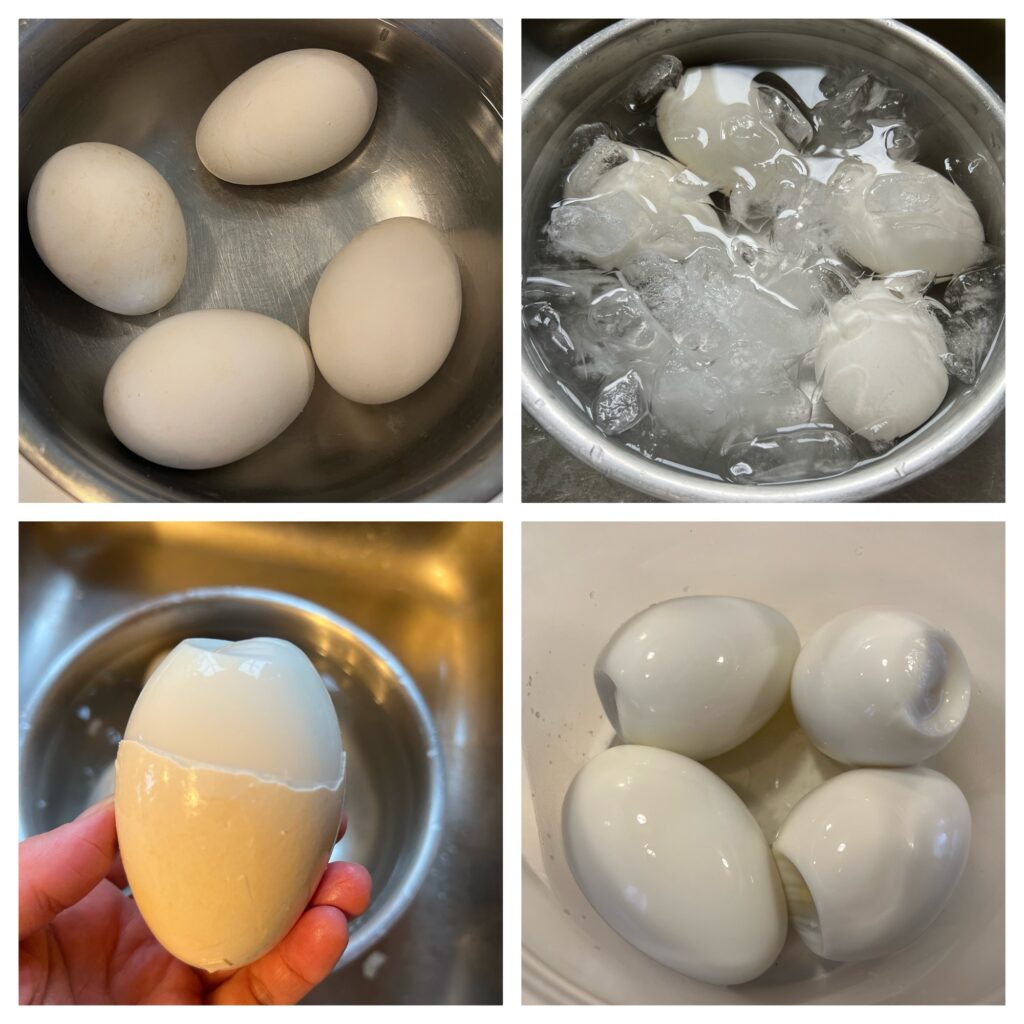
Once the pressure was released and I could open the IP, I removed the still very hot eggs with tongs and placed them into a bowl filled with ice water. I allowed them to cool until the ice was almost completely melted. I think I have, in the past, rushed this step when making hard-boiled eggs – trying to peel them while they were still a bit warm – and ended up with eggs that looked like a wolverine had done the job. This time, the eggs were nice and cool and the peeling was a dream. I tapped all around the egg with the heavy end of a butter knife and then easily removed the shell.
Imagine sitting down to breakfast of hard-boiled eggs and toast and looking at an absolutely enormous egg. Halved, the yolk is huge and creamy. It was ever-so-slightly soft in the very center, but when I cooked a second batch for a minute longer (with a minute longer natural release), the yolks were a bit overcooked and the whites had taken on a grayish-green tinge. Of the two, I prefer the slightly softer yolk without the extra color in the white.
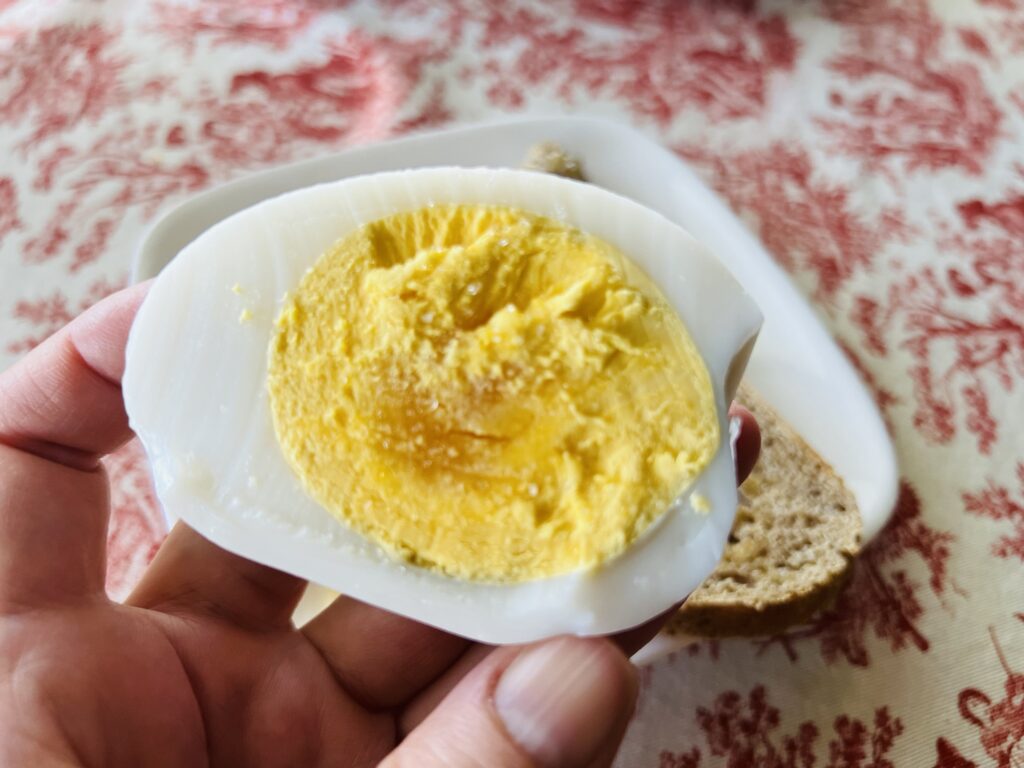
One of the amazing parts of having a goose egg for breakfast – or any time of day – is that a single goose egg is plenty. Generally considered to be the equivalent of two chicken eggs, it’s richer and more satisfying. If you happen to find yourself with some goose eggs for eating and you’re not sure what to do with them, think hard-boiled. You may never go back to chicken eggs!
Wondering what we’re going to do with the plethora of eggs we’re getting here on the farm? Stay tuned for more!